Skip to content

Recording yourself on a Mac can be done using built-in applications and third-party software. The method you choose will depend on what you want to record, whether it’s audio, video, or both. Here’s how you can record yourself using different methods:
1. Recording Audio:
Using QuickTime Player:
QuickTime Player is a built-in application on macOS that can be used to record audio.
- Open QuickTime Player from your Applications folder or by searching for it using Spotlight (Cmd + Space and then type “QuickTime Player”).
- In the menu bar, click on “File” and then select “New Audio Recording.”
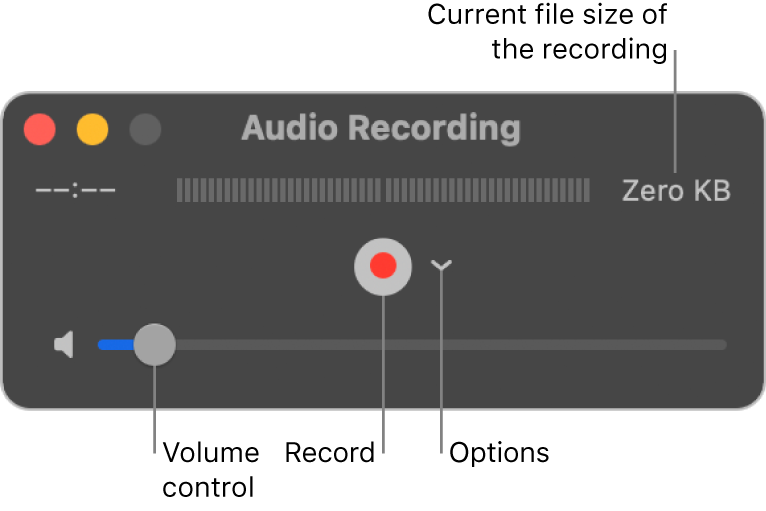
- A small audio recording window will appear. Click the record button (a red circle) to start recording your audio.
- When you’re done, click the stop button (a square).
- You can play back your recording to review it or save it by going to “File” > “Save.”
2. Recording Video:
Using QuickTime Player:
You can also use QuickTime Player to record video from your Mac’s camera.
- Open QuickTime Player.
- In the menu bar, click on “File” and then select “New Movie Recording.”
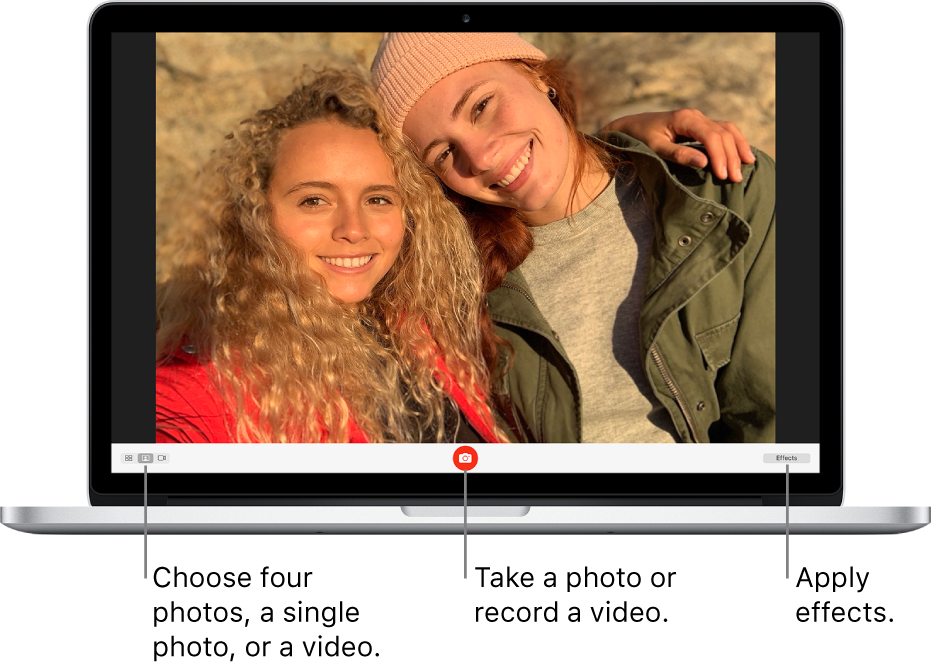
- A recording window will appear, showing the video feed from your Mac’s camera. Click the record button to start recording.
- Click the stop button when you’re finished recording.
- You can then review your recording and save it by going to “File” > “Save.”
3. Recording Both Audio and Video:
Using QuickTime Player:
You can use QuickTime Player to simultaneously record both audio and video.
- Open QuickTime Player.
- In the menu bar, click on “File” and then select “New Movie Recording.”
- Click the small arrow next to the record button in the recording window.
- From the dropdown menu, select your microphone and camera sources.
- Click the record button to start recording.
When done, click the stop button.
Save your recording by going to “File” > “Save.”
4. Using Third-Party Software:
There are various third-party applications available that offer more advanced recording features and editing options. Some popular options include OBS Studio (for both audio and video), Audacity (for audio recording), and ScreenFlow (for screen recording with audio and video).
To use third-party software, you generally need to:
- Download and install the software of your choice.
- Open the software and configure your recording settings (audio sources, video sources, quality settings, etc.).
- Start the recording when you’re ready.
- Stop the recording when you’re done.
- Edit and save the recording using the features provided by the software.
- Remember to check the documentation of the software you choose for specific instructions on how to record using that tool.
Whether you choose to use built-in applications or third-party software, always ensure you have the necessary permissions (for camera and microphone access) and that you are aware of the privacy implications of recording.
Read more: Creating a powerful marketing plan that resonates with consumer needs.
Third-party software options for recording yourself on a Mac:
Here are some popular third-party software options for recording yourself on a Mac:
- OBS Studio: Open Broadcaster Software (OBS) Studio is a powerful and free software for recording and streaming. It’s highly customizable and supports recording both audio and video, making it suitable for various purposes.
- Audacity: Audacity is a free and open-source audio recording and editing software. It’s great for recording podcasts, voiceovers, and other audio content. While it focuses on audio, you can combine it with screen recording software for a complete solution.
- ScreenFlow: ScreenFlow is a professional screen recording and video editing software that offers a range of features. It’s ideal for creating tutorials, demos, presentations, and more. It also includes audio recording capabilities.
- Camtasia: Camtasia is another premium software for screen recording and video editing. It offers a user-friendly interface and is suitable for creating educational videos, software tutorials, and marketing content.
- Filmora: Wondershare Filmora is a user-friendly video editing software that includes screen recording features. It’s suitable for beginners and offers a range of editing tools.
- Adobe Premiere Pro: If you’re looking for professional-level video editing and recording capabilities, Adobe Premiere Pro is a powerful option. It’s part of Adobe’s Creative Cloud suite and offers advanced editing features.
- Snagit: Snagit is a simple yet effective screen capture and recording software. It’s great for quickly capturing screenshots, recording short videos, and adding annotations.
- QuickTime Pro: While QuickTime Player is free on macOS, there’s also a paid version called QuickTime Pro that offers additional features, including more advanced video and audio recording options.
- Screenflick: Screenflick is a lightweight screen recording software that’s easy to use and offers basic recording and editing features.
- iShowU: iShowU is a screen recording and editing software that offers various recording options, customizable settings, and export options.
When choosing third-party software, consider your specific needs, whether it’s screen recording, audio recording, or a combination of both. Each software has its strengths, features, and learning curves, so you might want to try a couple of options to see which one best fits your requirements and preferences.
Read more: You’re working with an advertising campaign budget of 5000$?
Tips for recording yourself:
Here are some detailed and specific tips for recording yourself on a Mac, focusing on lighting, framing, microphone usage, and other important aspects:
1. Lighting:
Use Natural Light: Whenever possible, position yourself facing a window. Natural light creates even illumination and is generally more flattering than artificial lighting.
Avoid Direct Sunlight: Direct sunlight can create harsh shadows. If using natural light, diffuse it by using sheer curtains or placing a white sheet over the window.
Soft Artificial Light: If natural light isn’t sufficient, use soft artificial light sources like softbox lights, ring lights, or LED panels. Position them at eye level and slightly to the side for a more flattering look.
Three-Point Lighting: Consider using a three-point lighting setup: key light (main light source), fill light (reduces shadows), and backlight (separates you from the background).
2. Framing:
Rule of Thirds: Imagine your screen divided into a grid of nine squares. Position yourself at the intersections of these lines for a balanced and visually appealing composition.
Eye Level: Position your camera at eye level. This angle is more natural and engaging, avoiding unflattering angles from above or below.
Headroom and Composition: Leave a bit of space above your head and make sure you’re centered in the frame. Avoid cutting off the top of your head or having too much empty space.
Background: Choose a clean and clutter-free background that doesn’t distract from your content. If using a virtual background, make sure it’s professional and not too distracting.
3. Microphone:
External Microphone: If possible, use an external microphone for better audio quality. USB microphones or Lavalier microphones can provide clear and crisp sound.
Microphone Placement: Position the microphone close to your mouth, but out of the frame. Avoid placing it where it might block your face or cast shadows.
Noise Reduction: Choose a quiet recording environment to minimize background noise. Use foam windscreens or pop filters to reduce plosive sounds (pops when saying “p” and “b” sounds).
Audio Test: Record a short test to ensure your microphone is set up correctly and your audio levels are appropriate.
4. Clothing and Appearance:
Wardrobe Choice: Wear solid colors and avoid busy patterns or distracting jewelry. Choose colors that contrast with your background.
Grooming: Pay attention to your hair, makeup, and overall appearance. Ensure you’re comfortable and presentable on camera.
5. Camera Settings:
Resolution: Set your camera to record at the highest resolution available for better video quality. Usually, this is Full HD (1080p) or higher.
Frame Rate: Choose a frame rate that’s standard in your region (e.g., 24, 30, or 60 fps).
6. Testing and Preparation:
Technical Check: Before recording, test your camera, microphone, and lighting setup. Make sure all equipment is working properly.
Recording Environment: Turn off noisy appliances, close windows to reduce outside noise, and put your phone on silent to avoid interruptions.
7. Editing:
Cutting and Trimming: Use video editing software to remove any mistakes, pauses, or unnecessary content from your recording.
Color Correction: Adjust colors and brightness if needed to make the video look more appealing.
Audio Enhancement: Use audio editing software to remove background noise and enhance the audio quality.
Remember that practice and experimentation are key. The more you record and review your recordings, the better you’ll become at achieving the desired results. Don’t hesitate to make adjustments based on your own preferences and feedback from others.
Read more: Why do company choose outsource work?
Conclusion
In today’s digital landscape, mastering the art of recording yourself on a Mac is a valuable skill. Whether you’re delivering presentations, creating content, or connecting with others remotely, the quality of your recordings can significantly impact your message’s effectiveness.
To ensure top-notch recordings, pay attention to key factors like lighting, framing, and microphone selection. Adequate lighting, whether natural or artificial, sets the stage for a visually appealing video.
Framing yourself properly within the camera frame establishes a personal connection with your audience. Opting for an external microphone enhances audio quality, ensuring that your voice comes through with clarity.
Remember, practice is the pathway to improvement. Experiment with different setups, review your recordings and refine your techniques. Regardless of whether you’re using built-in Mac applications or third-party software, tailor your approach to suit your content’s specific needs.
Harness your Mac’s capabilities to create recordings that engage, educate, and entertain. With dedication and attention to detail, you’ll elevate your recording game and make a lasting impact in various spheres of communication.